We would love to offer you a detailed explanation of Dynamic Field and how it works with your customized email template.
TABLE OF CONTENT
I. Default Dynamic Field
1. << Request Number>>
2. <<Form Name>>
3. <<Respondent Email>>
4. <<Form Response Table>>
5. <<Approval Actions>>
6. << Document Button>>
7. <<Approval Status>>
8. <<edit response url>>
9. <<response sheet url>>
10. <<Request Date>>
11. <<Overall Status>>
12. <<Last Approver>>
II. Customize your own Dynamic Field from form questions
I. Default Dynamic Field
1. <<Request Number>>
This field represents for Request Number.
Modes that can be applied to this dynamic field:
- Approval Workflow
- Generate & Send Document
- Combine All Modes
a, How it appears in Email Template Dialog:
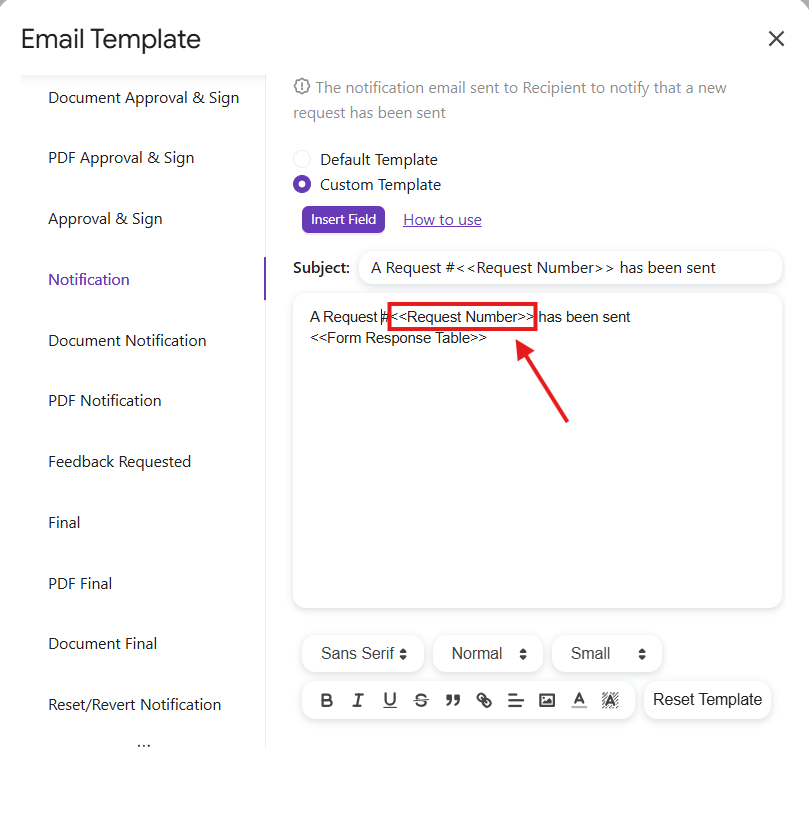
b, How it appears in a notification email:

2. <<Form Name>>
This field represents for the title of form.
Modes that can be applied to this dynamic field:
- Approval Workflow
- Generate & Send Document
- Combine All Modes
a, How it appears in Email Template Dialog:
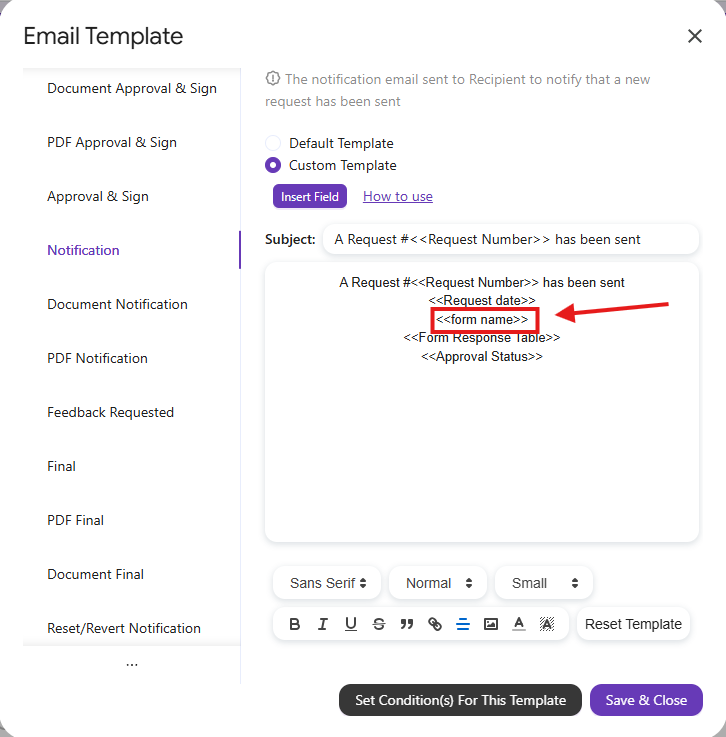
b, How it appears in a notification email:

3. <<Respondent email>>
This field represents for the email address of the form respondent.
Modes which can be applied this dynamic field:
- Approval Workflow
- Generate & Send Document
- Combine All Modes
a, How it appears in Email Template Dialog:

b, How it appears in notification email:

4. <<Form Response Table>>
This field represents for the table including questions and answers of submissions (Email content only).
Modes that can be applied to this dynamic field:
- Approval Workflow
- Generate & Send Document
- Combine All Modes
a, How it appears in Email Template Dialog:
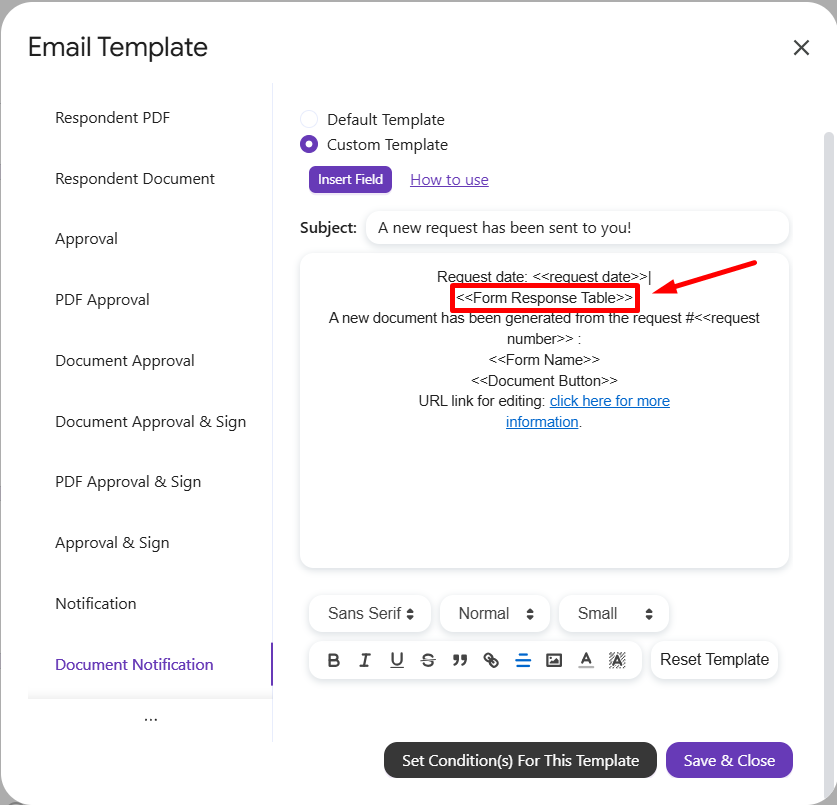
b, How it appears in notification email:

5. <<Approval Actions>>
This field shows 3 buttons: Approve/Reject & Comment, One-click Approve, One-click Reject. (Email content only).
Modes that can be applied to this dynamic field:
- Approval Workflow
- Combine All Modes
a, How it appears in Email Template Dialog:
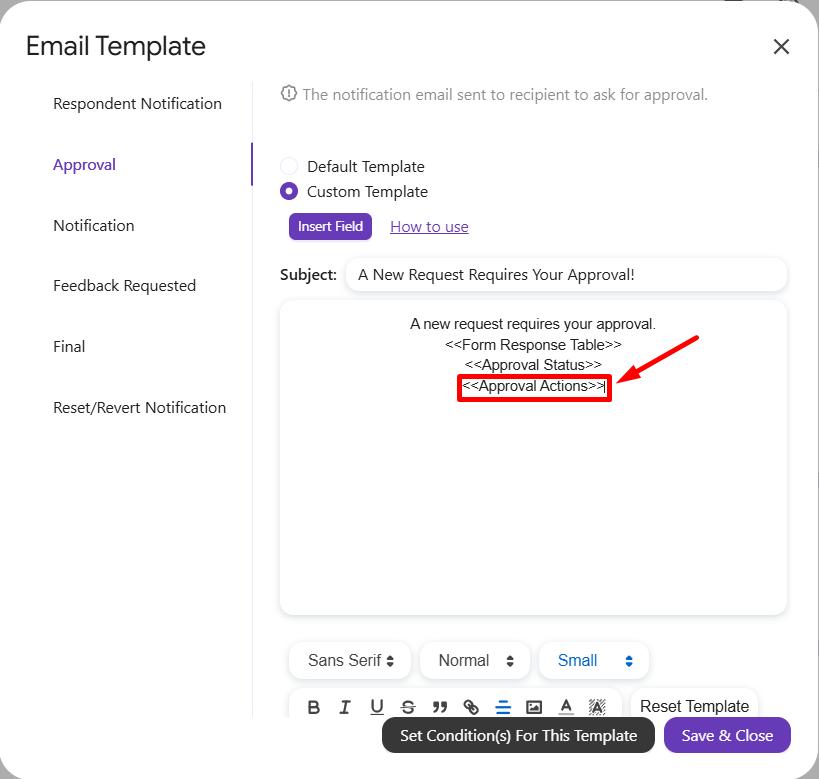
b, How it appears in the email:

5.1. <<Approve/Reject & Comment>>
This field will only generate Approve/Reject & Comment button.
5.2. <<One-click Approve>>
5.3. <<One-click Reject>>
By default, the Approval Actions field will generate all 3 fields, however these 3 more specified fields will help users customize the placement of buttons, descriptions between buttons or hide unnecessary buttons.
6. <<Document button>>
This field shows button to open generated document. Label of button changes depend on each role: Can view, can edit, can comment.
Modes which can be applied this dynamic field:
- Generate & Send Document (applies only for recipient with “Can view document” permission)
- Combine All Modes (applies only for recipient with “Can view document” permission)
a, How it appears in Email Template Dialog:
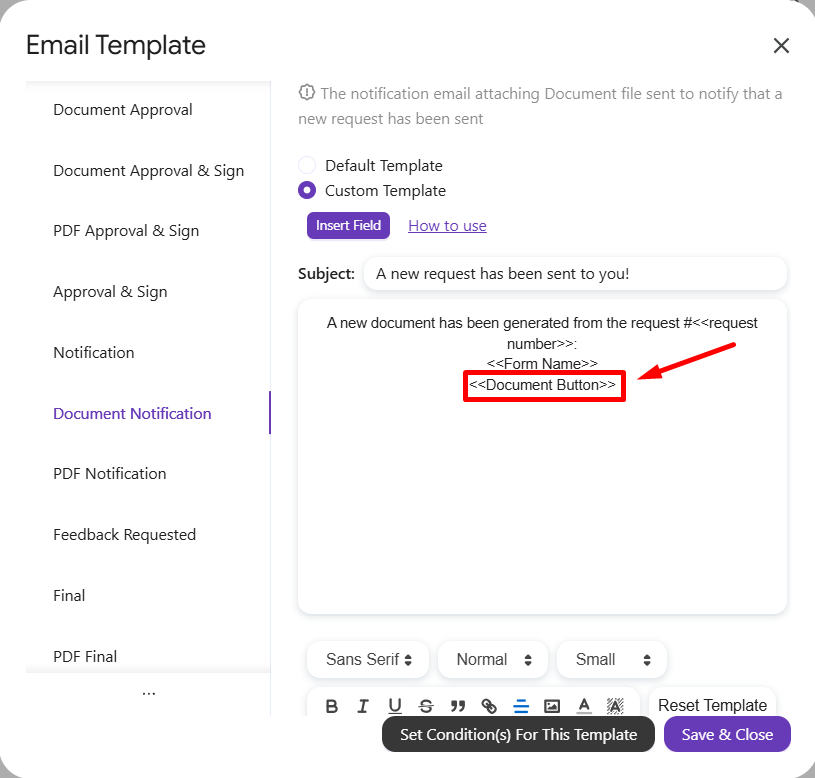
b, How it appears in the email:

7. <<Approval Status>>
This field shows Approval Status Table of Recipients (Email content only)
Modes which can be applied this dynamic field:
- Approval Workflow Only
- Combine All Modes
a, How it appears in Email Template Dialog:
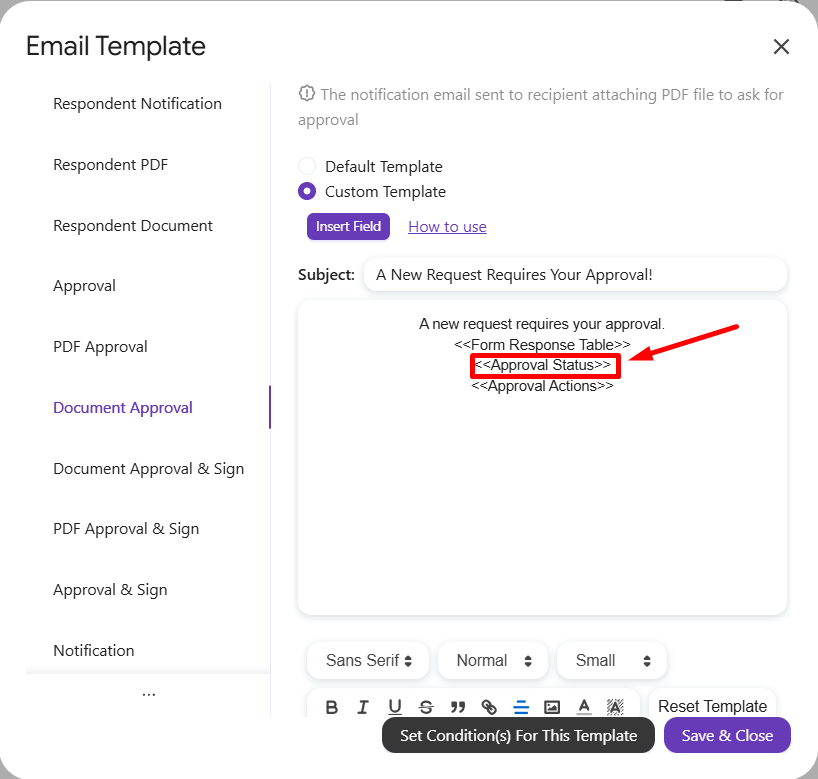
b, How it appears in the email:

8. <<edit response url>>
This field includes the link to modify submission (sumitted request).
Modes that can be applied to this dynamic field:
- Approval Workflow
- Generate & Send Document
- Combine All Modes
a, How it appears in Email Template Dialog:
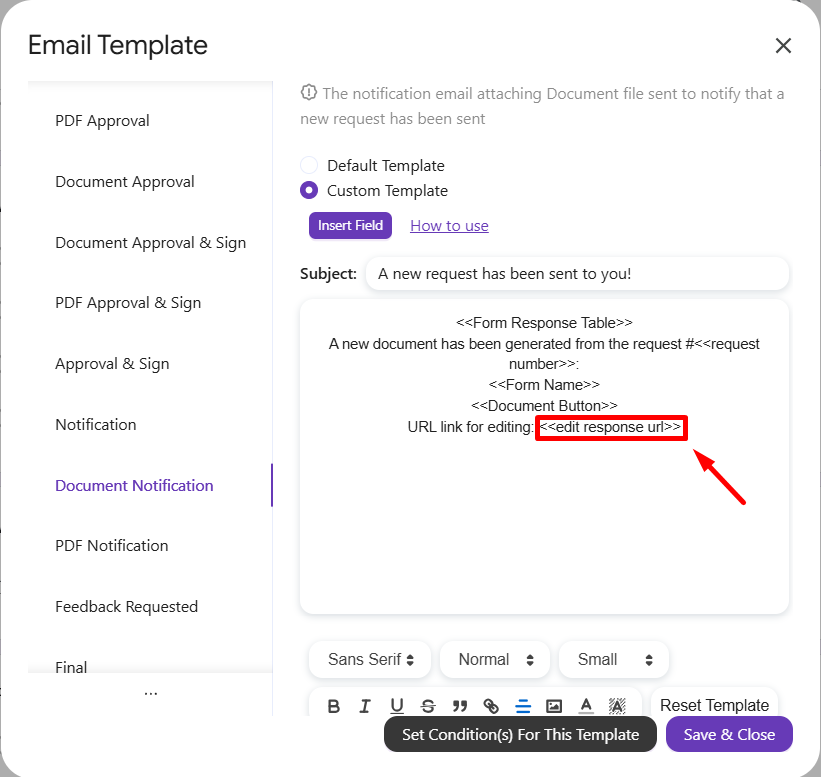
b, How it appears in the email:

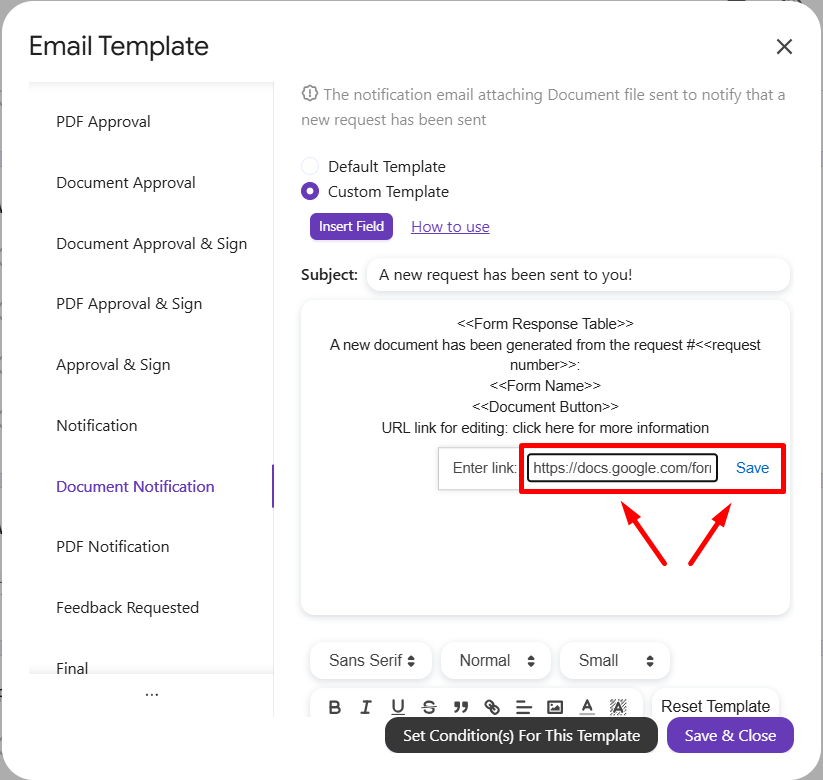
If you want to shorten the URL by using a hyperlink (insert a link into text), you can refer to the example below:
In Email Template Dialog, create a text to insert the <<Edit Response URL>>. Then click the Hyperlink button.
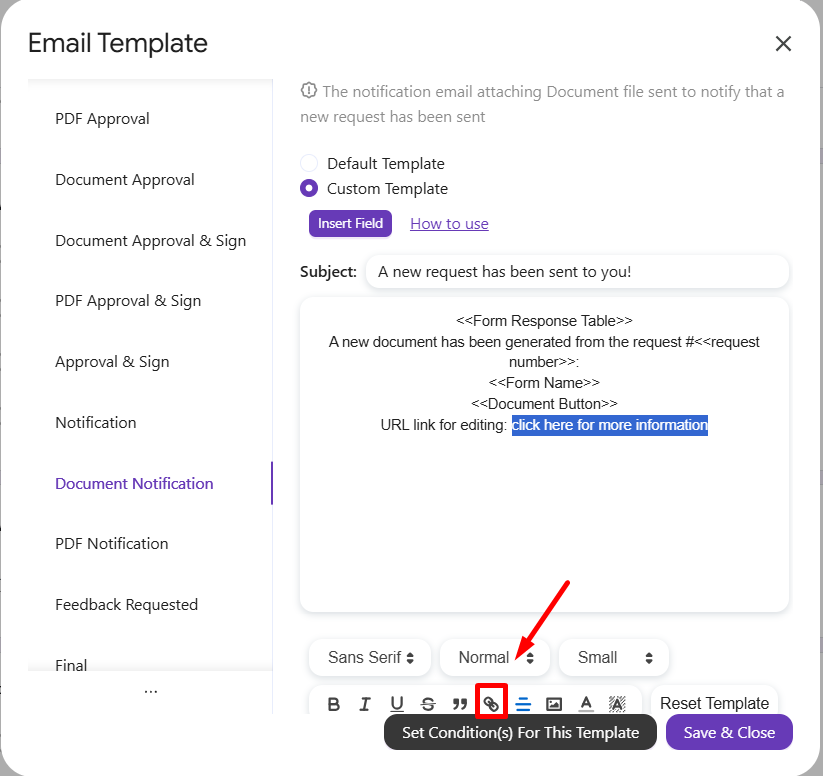
Enter <<edit response url>> to the box, then click ‘Save‘.
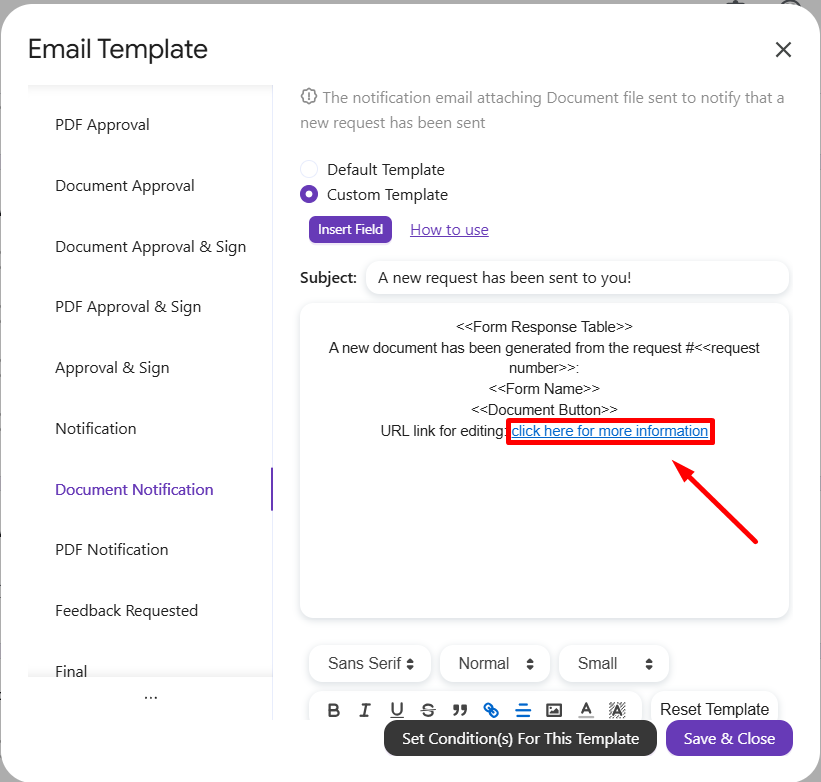
The Edit Response URL has been inserted into the chosen text.
9. <<response sheet url>>
This field includes the link to Response Sheet (Spreadsheet)
Modes that can be applied to this dynamic field:
- Approval Workflow
- Combine All Modes
a, How it appears in Email Template Dialog:
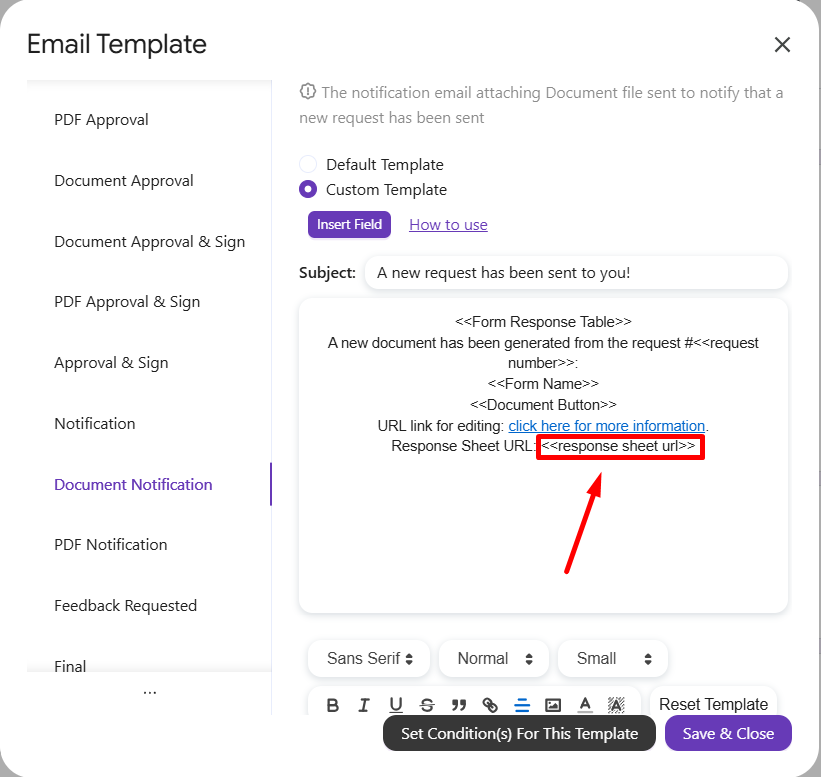
b, How it appears in the email:

10. <<request date>>
This field represents for the submission time of the request.
Modes that can be applied to this dynamic field:
- Approval Workflow
- Generate & Send Document
- Combine All Modes
a, How it appears in Email Template Dialog:

b, How it appears in the email:

11. <<overall status>>
This field shows the overall status of a request.
Modes that can be applied to this dynamic field:
- Approval Workflow
- Combine All Modes
a, How it appears in Email Template Dialog:
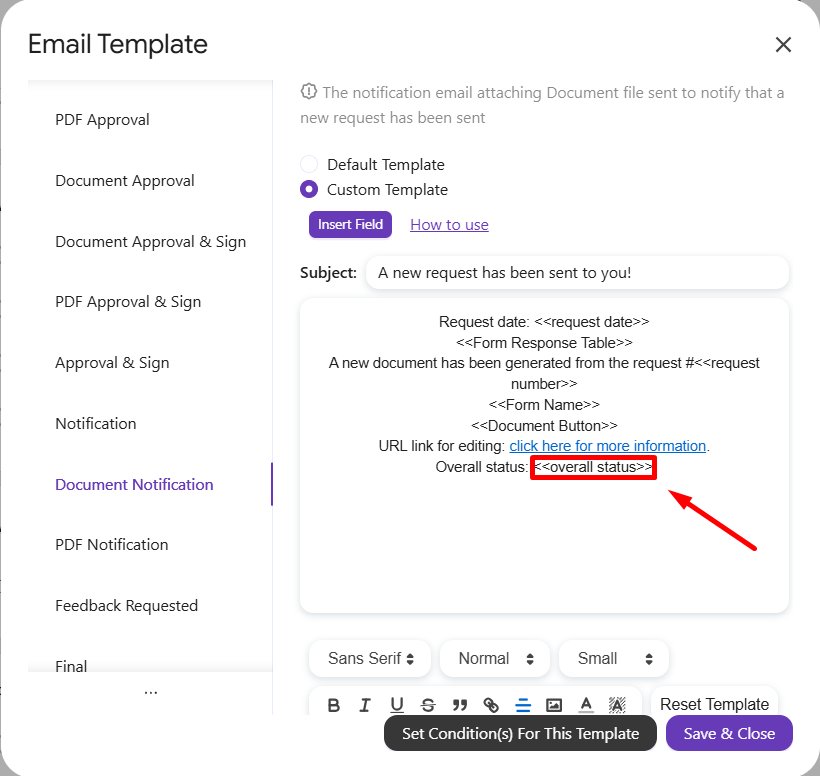
b, How it appears in the email:

II. Customize your own Dynamic Field from form questions
In addition, in order to set your own Dynamic Field from the questions in the form, it’s now easier than ever to perform it with PerformFlow.
Modes that can be applied to this dynamic field (while using a custom email template):
- Approval Workflow
- Generate & Send Document
- Combine All Modes
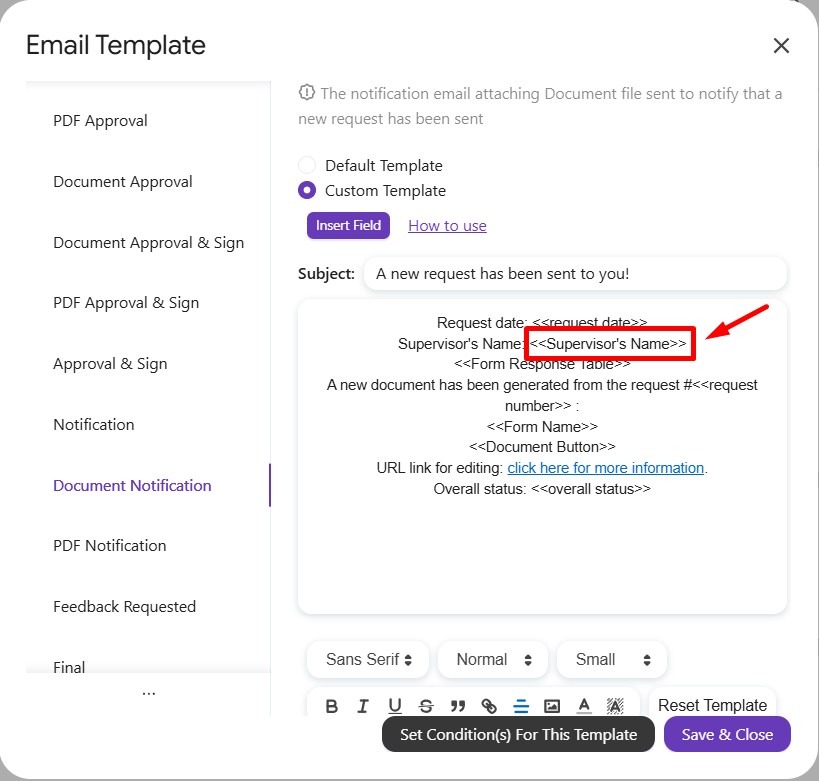
Let’s say you want to make the “Supervisor’s Name” field a Dynamic Field.
Step 1: Open your Email Template Dialog, choose a custom template and include <<Supervisor’s Name>> into the template.
You can use both the default Dynamic Field from the system and your custom Dynamic Field from form questions.
Step 2: Let’s see how it appears in email notification sent out to approver.

12. <<Last Approver>>
The <<Last Approver>> dynamic field displays the name of the most recent person who approved the request in the workflow.
That’s it! Automating approval workflow & generating PDF files at ease with PerformFlow!
For any questions or concerns, please email us at [email protected].