You can now display recipient comments directly within your generated PDF and Google Docs files.
Note: This feature is only available in Combine Mode.

How to Add Comment Fields to Your Template
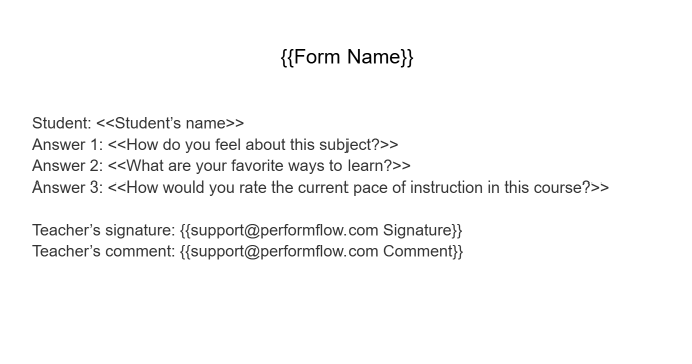
To display a specific recipient’s comment, use the Special Field tag in your Google Docs or Spreadsheet template.
Note: This Special Field works on a spreadsheet template as well.
The format depends on whose comments you want to display:
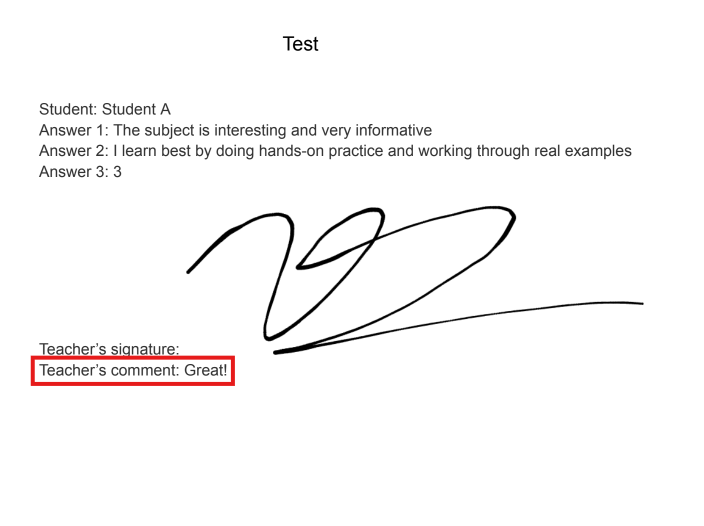
- Specific Recipient: Use {{X Comment}}, where X is the recipient’s email address (e.g., {{[email protected] Comment}}).
- All Recipients: Use {{Comments}} to display a summary of comments from everyone.
- Specific Approval Step: Use {{Step X Comments}}, where X is the workflow level number (e.g., {{Step 1 Comments}} for the first approver’s comment).
Important: Bracket Syntax Rules ({{ }} vs << >>)
We have updated our marker system to support curly brackets {{ }}. Please follow these guidelines when formatting your template fields:
Field Marker Format
Standard fields and special fields now support both {{ }} and << >> markers.
Standard (Default) Fields: {{Form Name}}, {{Request Number}}, {{Timestamp}}, {{Last Approver}}
Special Fields: {{X Signature}}, {{X Comment}}
Eg. You can use either {{Form Name}} or <<Form Name>>
Both formats are supported, but {{ }} is recommended because it provides broader compatibility.
However, Form Question Fields (the answers submitted by your respondents) must only use << >>. Curly brackets {{ }} are not supported for these fields.
Testing Your Setup
- Add the comment field (e.g., {{[email protected] Comment}}) into your template file.
- Submit a test request.
- After the recipient approves the request and submits a comment, you can view the comment under the approval status in your confirmation email.
- The generated file will automatically display the text in your designated special field location