- User Guide
Tips to Set Up Your First Workflow
Mode 1: Create Approval Workflow Only
1.1. Add Static & Dynamic Recipients
1.3. Set Conditions for the Recipient
1.7. Add & Use Recipient Group
Mode 2 & 3: Generate & Send PDF/document only
2.1. How to generate a PDF/document
2.2. Common file template errors
2.3. Send PDF/documents to recipients
2.4. Send PDF/documents to respondents
3.1. Combine Modes – Setup File Template
3.2. Combine Modes – Add recipients
Email Settings & Features:
4.1. Change Final Email Settings to Save Quota
4.3. Show or Hide the Sheets Report in the Final Email
4.4. Show File Attachment With Recipients
4.6. Customize Email Templates
4.8. Set Conditions for Custom Email Template
4.9. Add CC and BCC Email Addresses
Team Plan:
5.2. Share Edit Permission With Team Member
Additional Features:
6.1. Set Reminders for Approval Emails
6.2. Resend All Pending Requests
6.3. Dashboard or Form Management Page
6.5. Approval Link Authentication
6.6. Transfer All Forms to Another User
6.7. Transfer Paid Plan to Another User
6.8. Avoid Automatic Approval/Rejection
6.9. Signature on Generated PDF/Google Docs in Combined Mode
6.10. Approval Status Tracking Link for Respondent
6.11. Cancel a Request via Email
6.13. Change Approval Decision for Recipients
6.15. Approve via Dashboard for Recipients
6.16. Form Owner Approves on Behalf of Recipients
6.17. Bulk Actions: Approve, Reject, and Cancel
6.18. Set Conditions for Destination Folders
Learn how to make your first workflow easier.
1. Tips for multi-level workflow
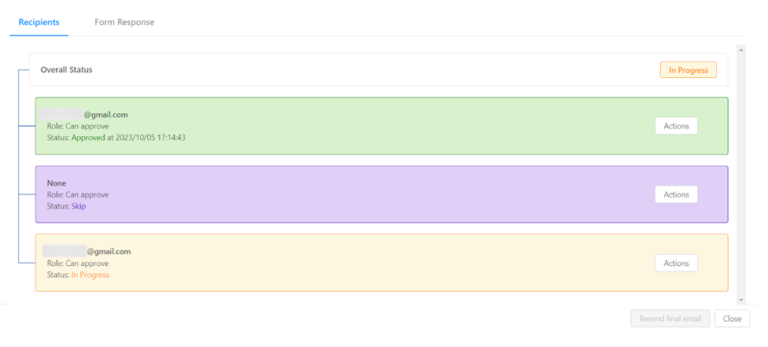
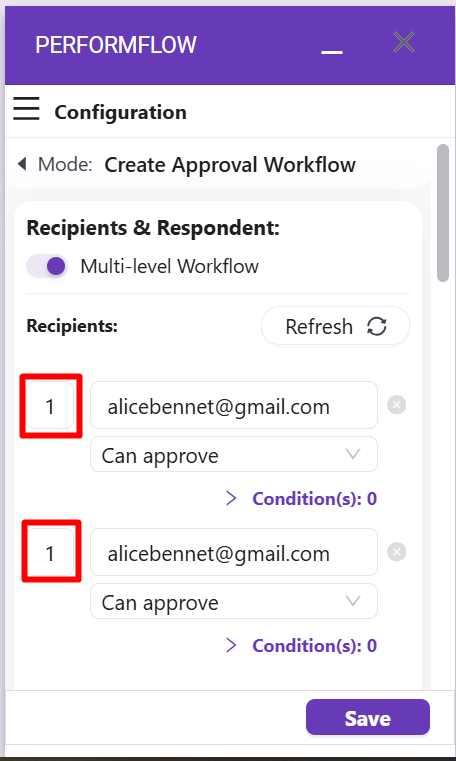
You can edit the level number of recipients to be the same as each other. This will form a new workflow in which, at a certain level, two (or more than two) recipients need to approve the email if they want to move to the next level. The image below is an example for your reference.
2. Tips to save monthly quota
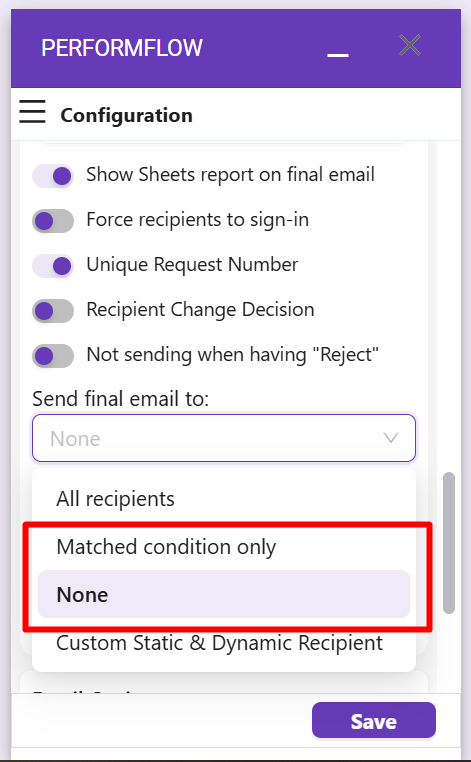
The number of emails in your monthly quota can greatly be saved by not sending final emails to all recipients or only sending final emails to recipients you set conditions for. In the Advanced Options, find ‘Send final Email to’, and select ‘None’ or ‘Matched condition only‘.
3. Setting in Advanced Options
To ensure your workflows have better security, you can force the recipients to sign in if they want to see the Report Sheet (turn ON the ‘Force recipients to sign-in‘ in the Advanced Options).
Another tip for a higher secured setting is not showing the Report Sheet in the final email. Some of our users find the Report Sheet unnecessary to be shown in the final email, or they do not want to make the Report Sheet available to the recipients. To do this, find ‘Show Sheets report on final email‘ in the Advanced Options and switch it OFF.

4. Tips to avoid wrong answers to question for respondent's email address
When you ask for an email address, you want to make sure the person leaves a valid email address. Sometimes the respondent will type other things into the answer box and you want to make sure they leave an actual email. Therefore, you should adjust the setting of the question in Google Form setting with our add-on:
- The question type must be “Short answer.”
- The “Required” button must be turned ON.
- The “Response validation” must be “Text” and “Email”.
Click on the 3 dots in the bottom right-hand corner and choose “Response validation.” Then, change from the default of looking for a “Number” to expect a “Text” response, and the next field will be set as “Email” format. The setting should look like this:
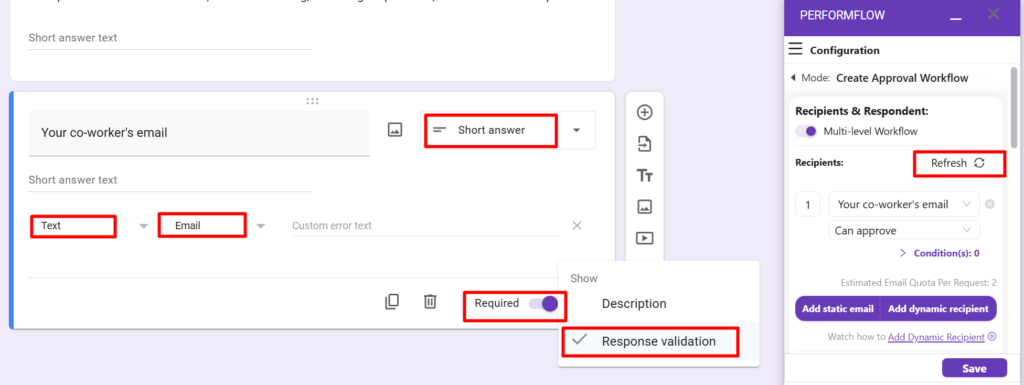
Finally, click “Refresh” and “Save” your modification.
5. Proactively skip the approval for recipients
For dynamic recipients, form respondents can fill out or select an approver’s email address right in the selected form. However, they can proactively skip such approval for the recipient if not needed, and here’s a setup tip to walk you through!
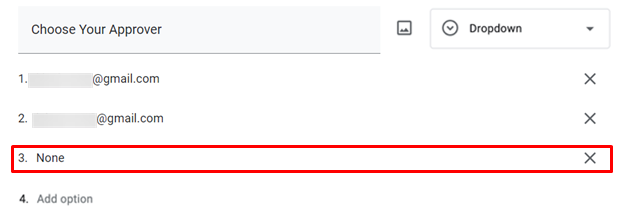
Step 1: Define a dynamic recipient in your selected form with a ‘None’ option.
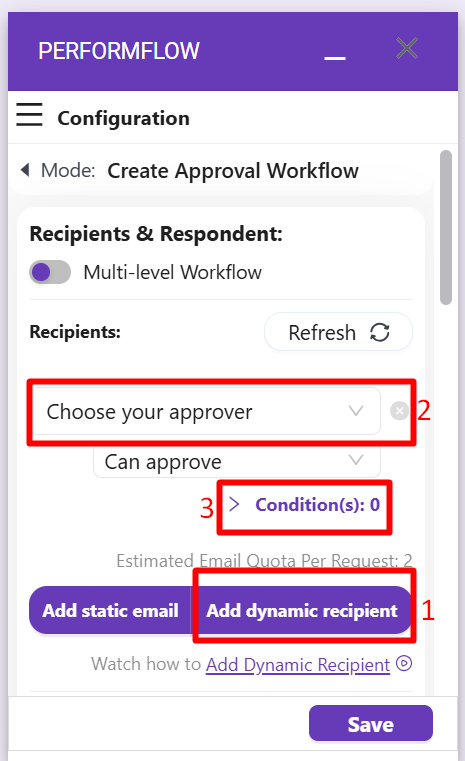
Step 2: Select the above dynamic recipient field in the add-on configuration.
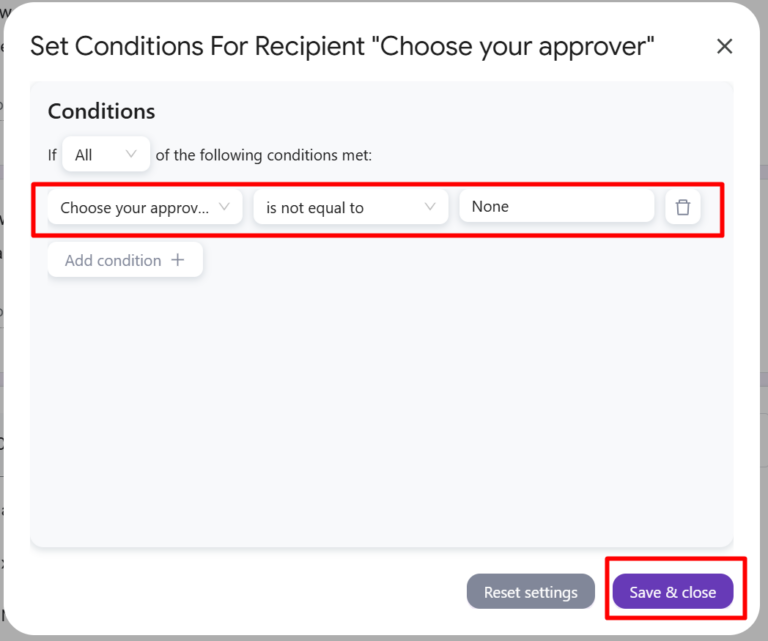
Step 3: Set its condition as ‘is not equal to’ the ‘None’ option.
Result: With the condition set, the approval will be skipped with that recipient and continue to the next steps. However, if there is only 1 recipient or that recipient is in the final step, the overall status will be automatically marked as approved.