- User Guide
Tips to Set Up Your First Workflow
Mode 1: Create Approval Workflow Only
1.1. Add Static & Dynamic Recipients
1.3. Set Conditions for the Recipient
1.7. Add & Use Recipient Group
Mode 2 & 3: Generate & Send PDF/document only
2.1. How to generate a PDF/document
2.2. Common file template errors
2.3. Send PDF/documents to recipients
2.4. Send PDF/documents to respondents
3.1. Combine Modes – Setup File Template
3.2. Combine Modes – Add recipients
Email Settings & Features:
4.1. Change Final Email Settings to Save Quota
4.3. Show or Hide the Sheets Report in the Final Email
4.4. Show File Attachment With Recipients
4.6. Customize Email Templates
4.8. Set Conditions for Custom Email Template
4.9. Add CC and BCC Email Addresses
Team Plan:
5.2. Share Edit Permission With Team Member
Additional Features:
6.1. Set Reminders for Approval Emails
6.2. Resend All Pending Requests
6.3. Dashboard or Form Management Page
6.5. Approval Link Authentication
6.6. Transfer All Forms to Another User
6.7. Transfer Paid Plan to Another User
6.8. Avoid Automatic Approval/Rejection
6.9. Signature on Generated PDF/Google Docs in Combined Mode
6.10. Approval Status Tracking Link for Respondent
6.11. Cancel a Request via Email
6.13. Change Approval Decision for Recipients
6.15. Approve via Dashboard for Recipients
6.16. Form Owner Approves on Behalf of Recipients
6.17. Bulk Actions: Approve, Reject, and Cancel
6.18. Set Conditions for Destination Folders
Learn how to setup multi-level workflow.
1. How multi-level workflow works
- If the first recipient approves: the approval email will be sent to the second recipient on the list, and so on.
- If the first recipient rejects: the request will be rejected, then a final-status email will be sent to all recipients (and the respondent if added) informing that the request is rejected. This rule also applies for if the first recipient approved, yet later recipient rejects.

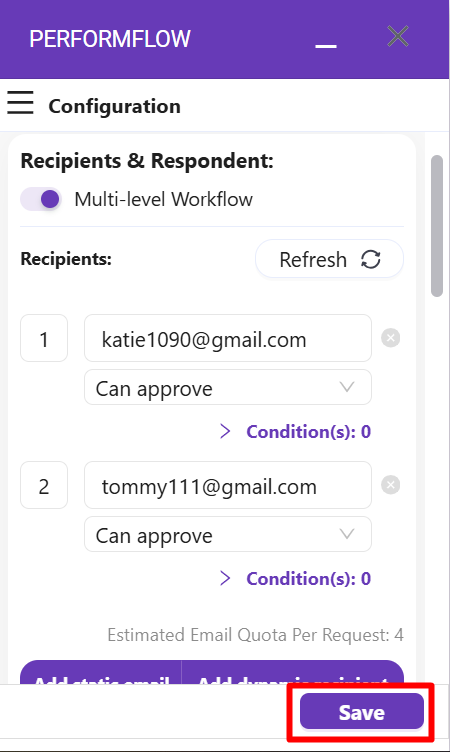
Next, you will see numbered boxes appear on the left side of each recipient field.
Here you can set the order number for each recipient. The numbers will determine who can receive approval email 1st and who receive email later.
*Note: To make sure this feature functions properly, you must set the first recipient as number “1”, then second recipient as number “2”, and so on.
Finally, click “Save” and your multi-level workflow will be activated.
3. Tips to make the multi-level workflow more flexible and coherent
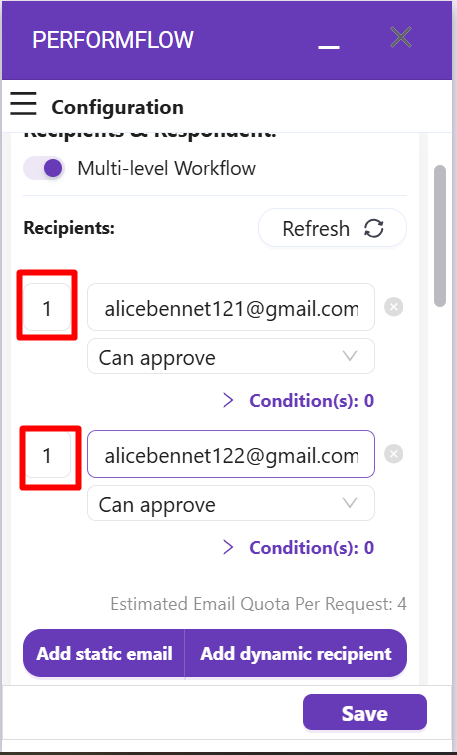
You can edit the step number of recipients to be the same as each other. This will form a new workflow in which, at a certain step, two (or more than two) recipients need to approve the email if they want to move to the next step. The image below is an example for your reference.
Another useful tip is that you can combine different conditions for recipients having the same step number. This will form a new workflow in which the recipients’ approvals depend on the conditions above.
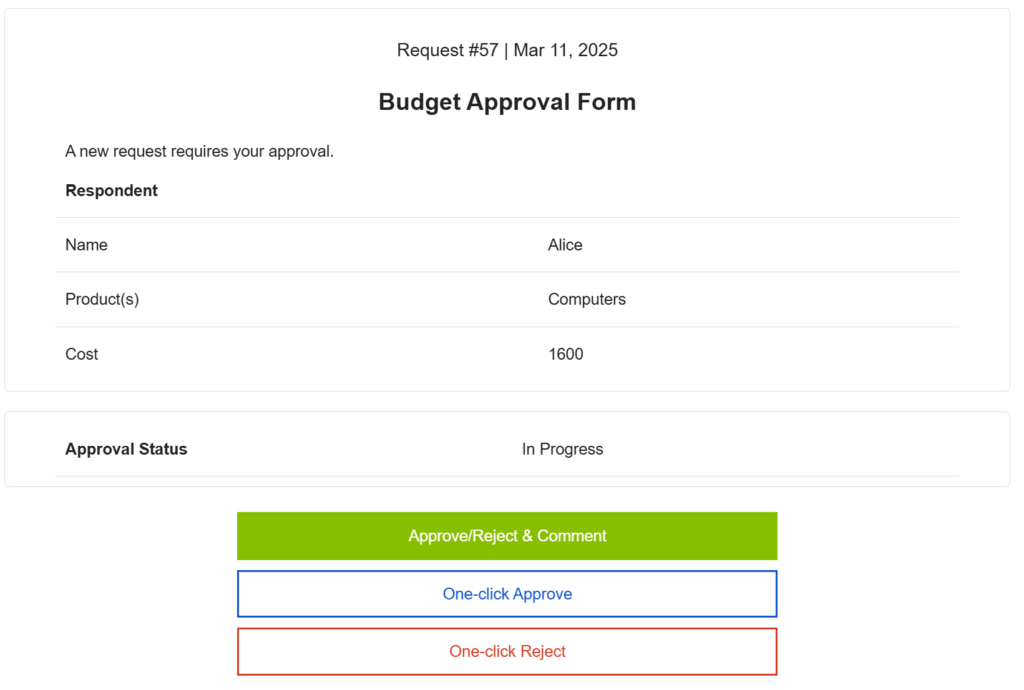
For example, we have a Google Form called ‘Budget approval Form’. We will set the conditions of the ‘Cost’ question for our two recipients: ‘[email protected]‘ and ‘[email protected]‘.

To set conditions, go to the ‘Recipients & Respondent’ section and add the two recipients’ static emails with the same step number.
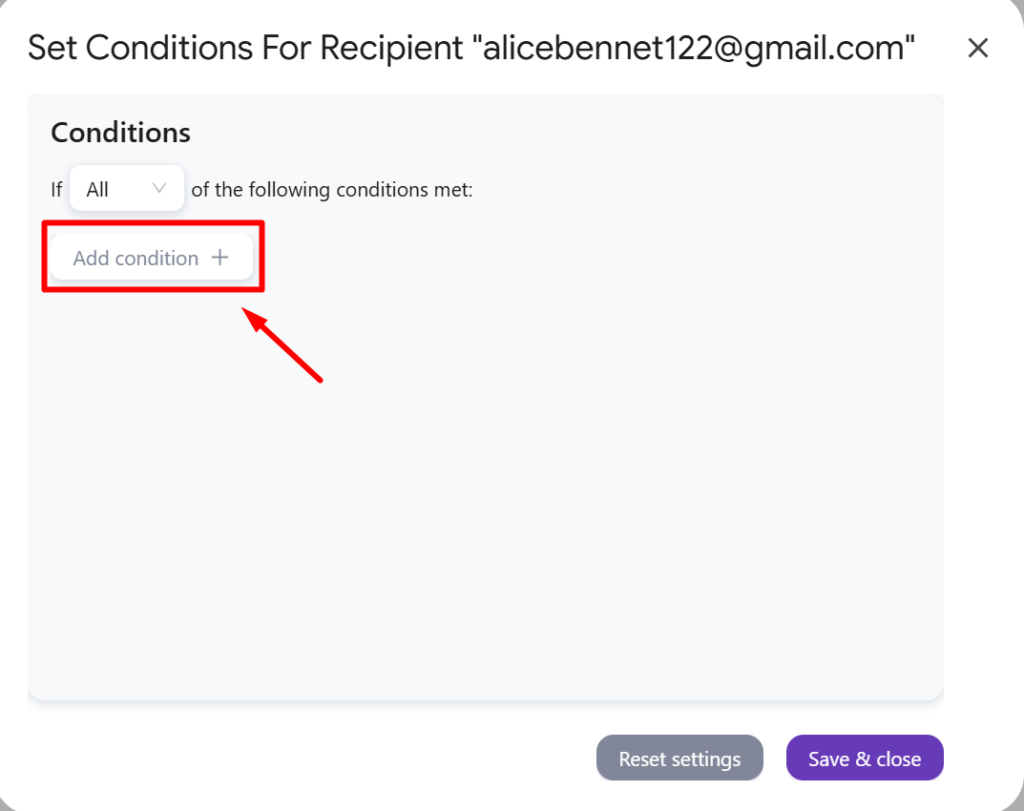
There you can see ‘Conditions: 0‘. As we haven’t set any conditions yet, the number of them is zero. Click ‘Condition: 0‘ to start editing the conditions for each recipient:
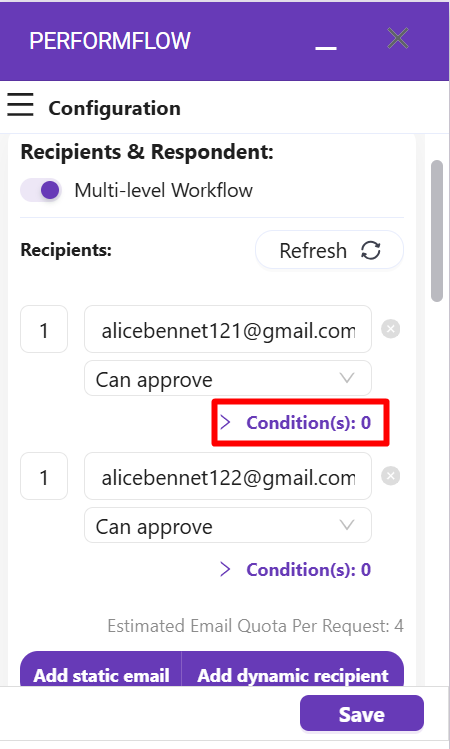
Clicking ‘Conditions: 0’ will open a box Set Conditions For Recipient “[email protected]”. Then click ‘Add condition’ to see the options.
To begin with, you should choose ‘One’ or ‘All’ to apply one or all of the conditions for recipients.
There are 3 fields you can adjust to suit your needs.
- The first field presents the question of the Google Form you want to attach the condition. Simply click the arrow to see the scroll down of those questions. It’s the ‘Cost’ question in the example.
- The second field shows measurements that will distinguish between the answers’ questions with and without conditions.
- The last field is the characters indicating the differences between the answers’ questions with and without conditions.
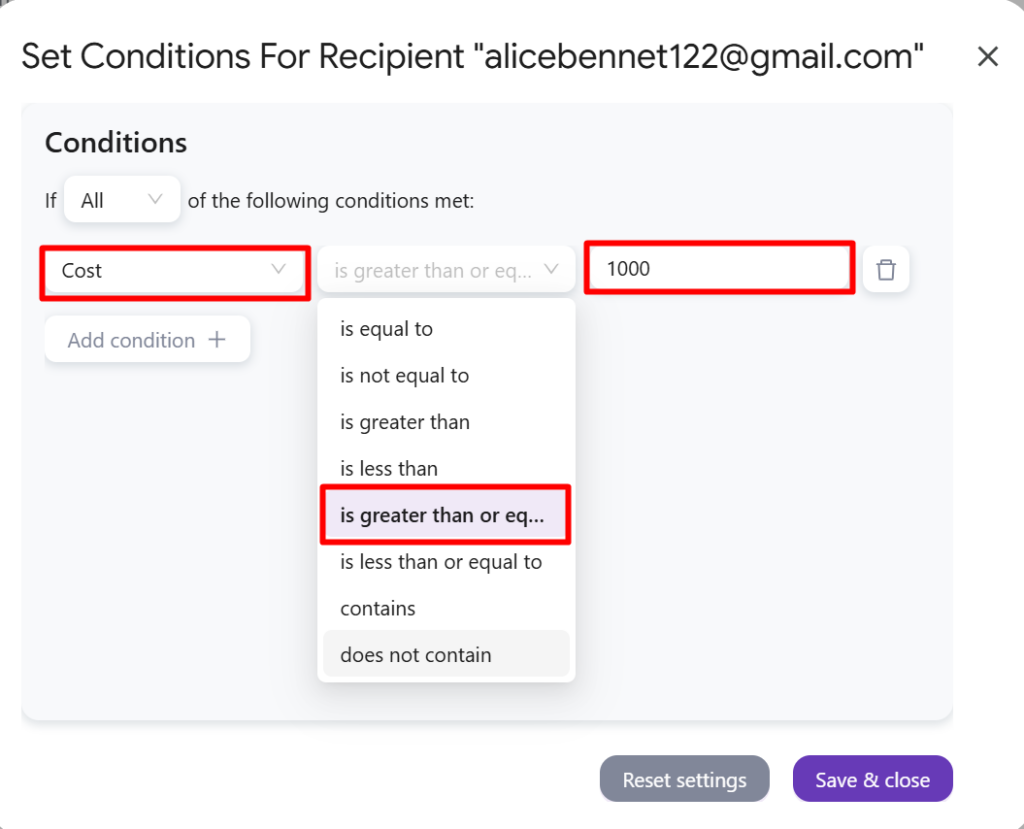
The condition for the recipient ‘[email protected]’ answering the ‘Cost’ question is set as ‘is greater than or equal to 1000‘. It means that this recipient will receive and be able to approve the request if the ‘Cost’ of the request is greater than or equal to 1000, and vice versa.
Meanwhile, the other recipient ‘[email protected]’ will still receive the approval email as we didn’t set any conditions for this recipient.
Here is the email to the recipient having the condition ‘the cost is greater than or equal to 1000‘: