- User Guide
Tips to Set Up Your First Workflow
Mode 1: Create Approval Workflow Only
1.1 Add Static & Dynamic Recipients
1.3 Set Conditions for Recipient
Mode 2 & 3: Generate & Send PDF/document only
2.1 How to generate PDF/document
2.2 Common file template errors
2.3 Send PDF/documents to recipients
2.4 Send PDF/documents to respondents
3.1 Combine Modes – Setup File Template
3.2 Combine Modes – Add recipients
Email Settings & Features:
4.1. Options for Sending Final Email
4.3. Show or Hide the Sheets Report in the Final Email
4.4. Show File Attachment Links on Emails
4.5. Resend Email to Recipient & Edit Recipient Email
4.8. Set Conditions for Custom Email Template
4.9. Add CC and BCC Email Addresses
Team Plan:
Additional Features:
6.1 Set Reminder & Auto Approve/Reject
6.2 Resend All Pending Requests
6.5 Approval Link Authentication
6.7 Transfer Paid Plan To Other User
6.8 Avoid Automatic Approval/Rejection
6.11. Cancel a Request via Email
6.13. Change Decision for Recipients
6.15. Approve via Dashboard for Recipients
6.16. Form Owner Approves on Behalf of Recipients
6.17. Bulk Actions: Approve, Reject, and Cancel
In this article, we will show you how to cancel a request on the form respondent’s end.
In the notification email for the form respondent, there is a “Cancel” button under the form response table:
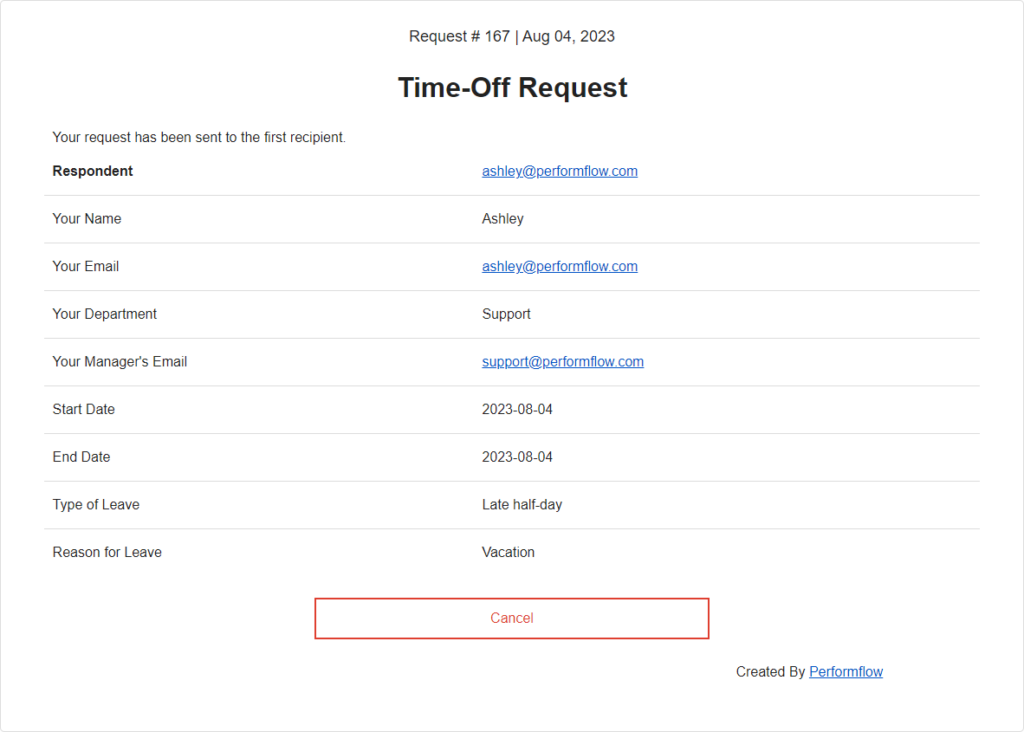
Clicking the “Cancel” button will cancel a request immediately. Kindly note that if all recipients have already approved a request, it cannot be canceled.
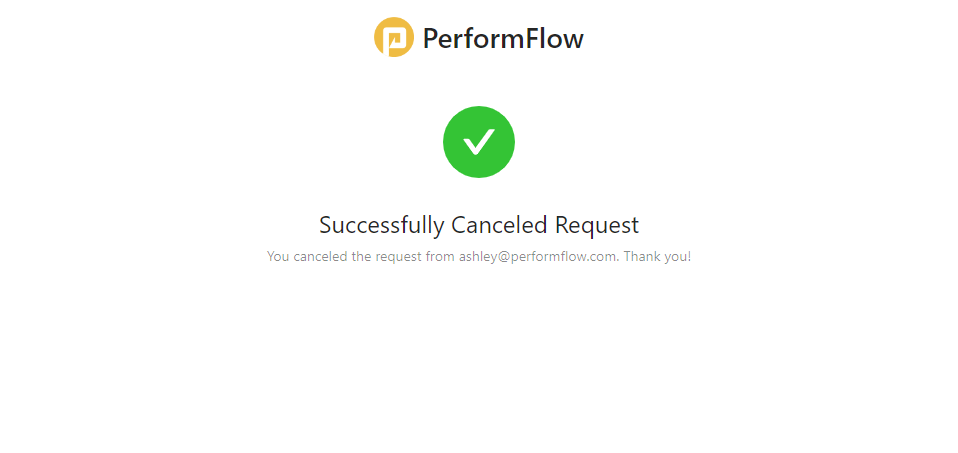
The Approval Status will be marked as “Canceled.” Also, the add-on will update the response sheet and send out the final email accordingly.
Note: Temporarily, you cannot turn off this feature.