- User Guide
Tips to Set Up Your First Workflow
Mode 1: Create Approval Workflow Only
1.1 Add Static & Dynamic Recipients
1.3 Set Conditions for Recipient
Mode 2 & 3: Generate & Send PDF/document only
2.1 How to generate PDF/document
2.2 Common file template errors
2.3 Send PDF/documents to recipients
2.4 Send PDF/documents to respondents
3.1 Combine Modes – Setup File Template
3.2 Combine Modes – Add recipients
Email Settings & Features:
4.1. Options for Sending Final Email
4.3. Show or Hide the Sheets Report in the Final Email
4.4. Show File Attachment Links on Emails
4.5. Resend Email to Recipient & Edit Recipient Email
4.8. Set Conditions for Custom Email Template
4.9. Add CC and BCC Email Addresses
Team Plan:
Additional Features:
6.1 Set Reminder & Auto Approve/Reject
6.2 Resend All Pending Requests
6.5 Approval Link Authentication
6.7 Transfer Paid Plan To Other User
6.8 Avoid Automatic Approval/Rejection
6.11. Cancel a Request via Email
6.13. Change Decision for Recipients
6.15. Approve via Dashboard for Recipients
6.16. Form Owner Approves on Behalf of Recipients
6.17. Bulk Actions: Approve, Reject, and Cancel
Understand how to send generated PDF file & Google documents to your recipients.
Table of Content:
- Send PDF/document to static recipients
- Send PDF/document to dynamic recipients
For starters, you will need to switch mode to ‘Generate & send document/PDF‘ if you haven’t.
In this mode, you can set up document/PDF generation and add recipients to send them the generated files.
1. Send PDF/document to static recipients
In this guide, we will suppose that you already know how to set up a file template via Document & PDF tab (it is similar to ‘Generate PDF/document‘ mode).
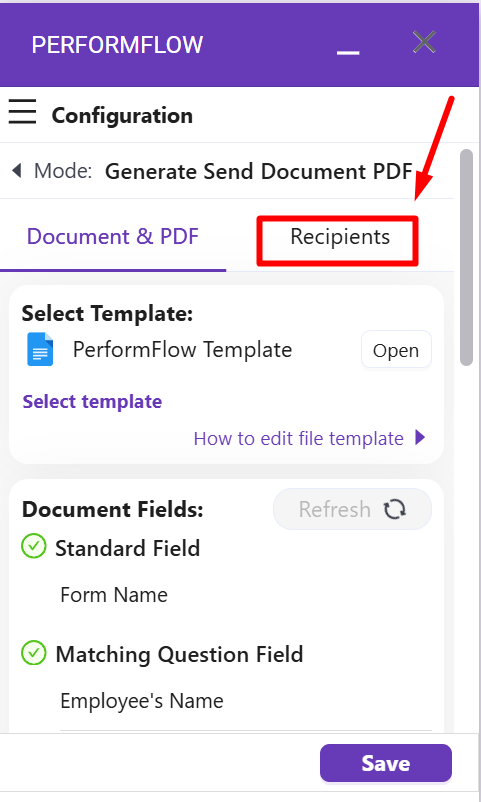
Supposed that you have finished setting up & adding the file template to the add-on, you can go to ‘Recipients‘ tab by selecting Recipients on top of the Configuration menu:
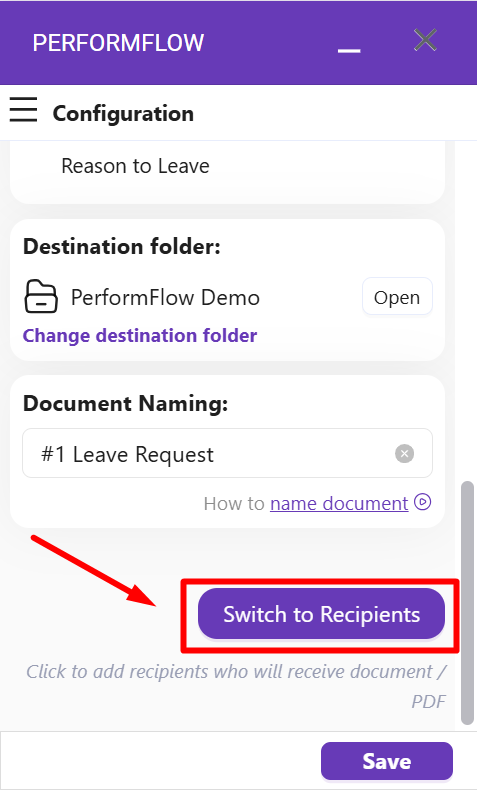
You can also scroll down to the bottom of the menu and click ‘Switch to Recipients’:
In the ‘Recipients’ tab, click ‘Add static email‘ to add a static recipient’s email on the add-on. It will create a blank where you can enter a specific email address:
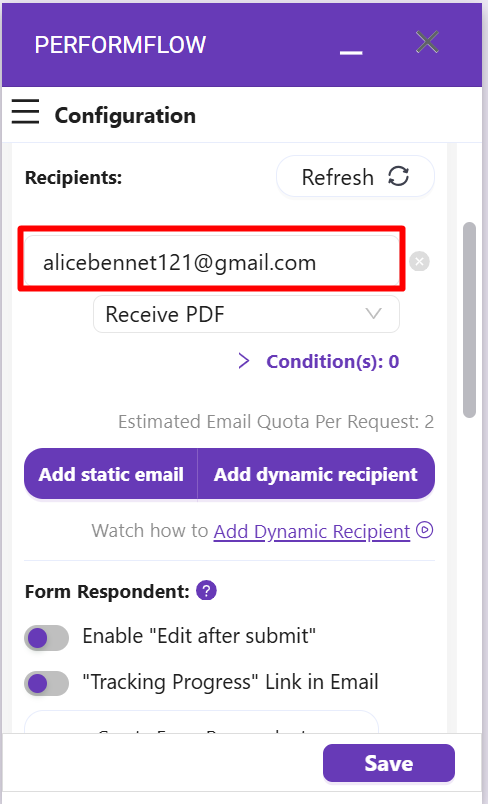
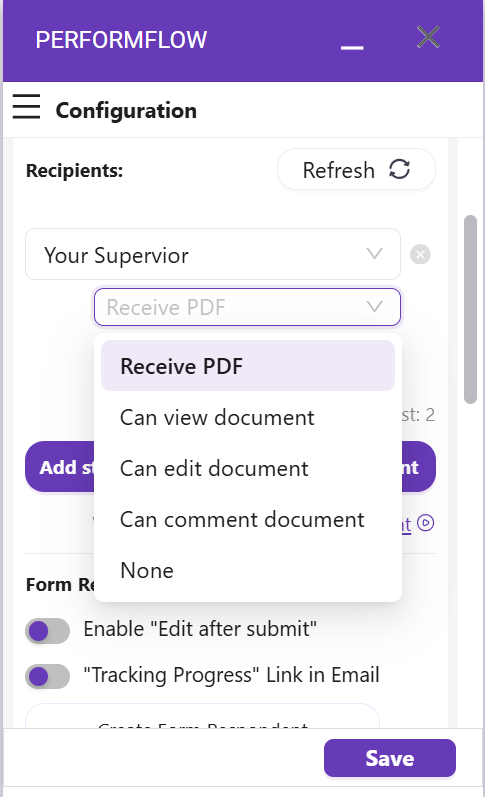
After that, click ‘Receive PDF‘ to see the drop-down and select which type of file your recipient can receive, including:
- Receive PDF: meaning the recipient will receive the generated PDF only.
- Can view document: meaning the recipient will receive the generated Google Docs only.
- Can edit document: meaning the recipient will receive the generated Google Doc and be able to edit this document directly.
- Can comment document: meaning the recipient will receive the generated Google Docs and be able to comment on this document.
Finally, click ‘Save‘.
2. Send PDF/document to dynamic recipients
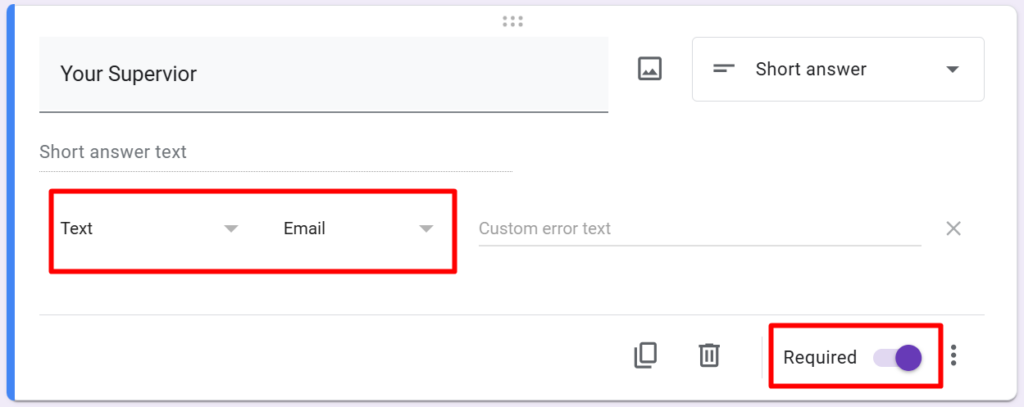
First, it is highly recommended to create a question in which your respondents can enter their email addresses (or select an email address if it is a multiple-choice question).
This question should be set as Required (*) and it has Response validation as Text and Email address:
Next, click the “Add dynamic recipient” button of the add-on:
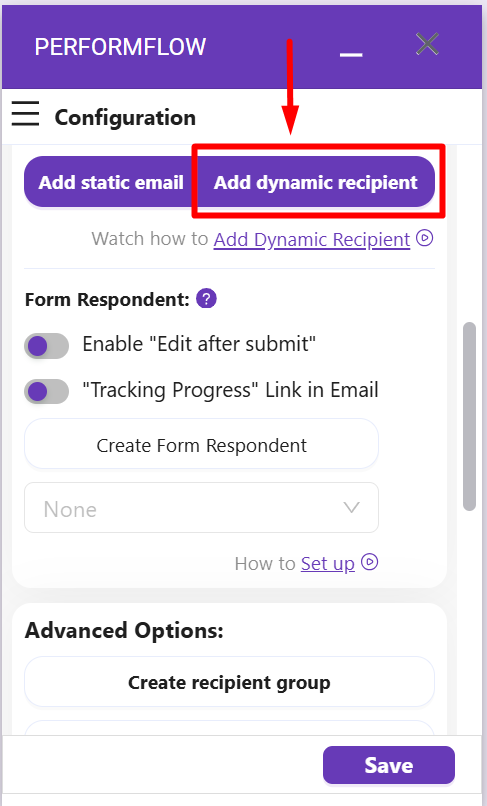
Similar to adding static email, a dynamic field will appear above the buttons for you to select the question which asks the respondent to enter/select an email address. In the example above, we have a question called ‘Your Supervisor‘.
Finally, select which file type this dynamic recipient can receive by choosing an option from the drop-down below the field. These options are similar to the static recipient section:
Finally, click ‘Save‘.