- User Guide
Tips to Set Up Your First Workflow
Mode 1: Create Approval Workflow Only
1.1 Add Static & Dynamic Recipients
1.3 Set Conditions for Recipient
Mode 2 & 3: Generate & Send PDF/document only
2.1 How to generate PDF/document
2.2 Common file template errors
2.3 Send PDF/documents to recipients
2.4 Send PDF/documents to respondents
3.1 Combine Modes – Setup File Template
3.2 Combine Modes – Add recipients
Email Settings & Features:
4.1. Options for Sending Final Email
4.3. Show or Hide the Sheets Report in the Final Email
4.4. Show File Attachment Links on Emails
4.5. Resend Email to Recipient & Edit Recipient Email
4.8. Set Conditions for Custom Email Template
4.9. Add CC and BCC Email Addresses
Team Plan:
Additional Features:
6.1 Set Reminder & Auto Approve/Reject
6.2 Resend All Pending Requests
6.5 Approval Link Authentication
6.7 Transfer Paid Plan To Other User
6.8 Avoid Automatic Approval/Rejection
6.11. Cancel a Request via Email
6.13. Change Decision for Recipients
6.15. Approve via Dashboard for Recipients
6.16. Form Owner Approves on Behalf of Recipients
6.17. Bulk Actions: Approve, Reject, and Cancel
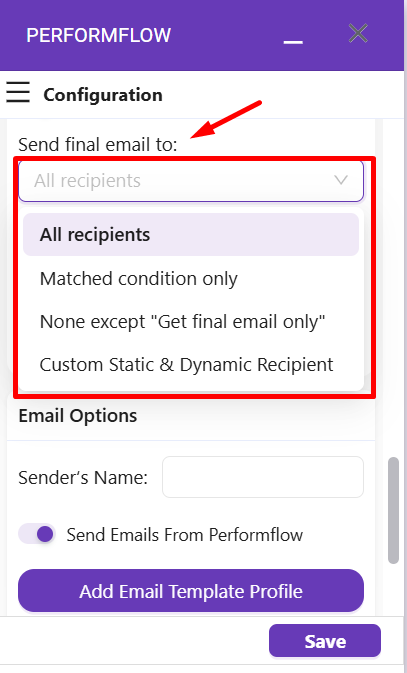
You can choose how PerformFlow sends final emails to your recipients after the approval process is complete. This feature helps you control who receives the final notification.
Available Options
All recipients – Send the final email to every recipient.
Matched condition only – Send the final email only to recipients who meet the set conditions.
None – Do not send the final email to any recipient.
Custom recipients – Select or add specific recipients manually.
Set the Sending Option
1. In the configuration menu, find the field Send final email to.

2. Click the field and select your preferred option.
3. Click Save to apply your changes.
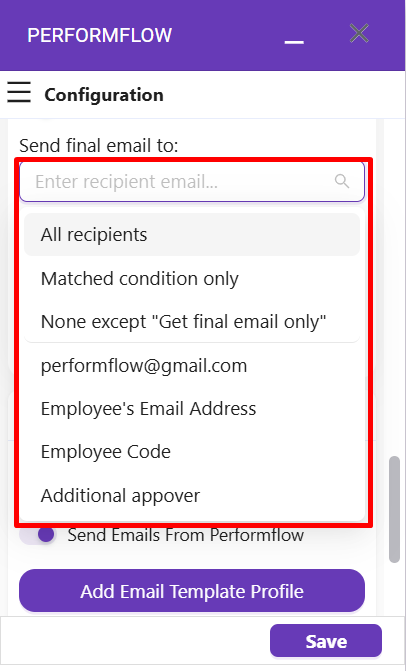
Use Custom Static & Dynamic Recipients
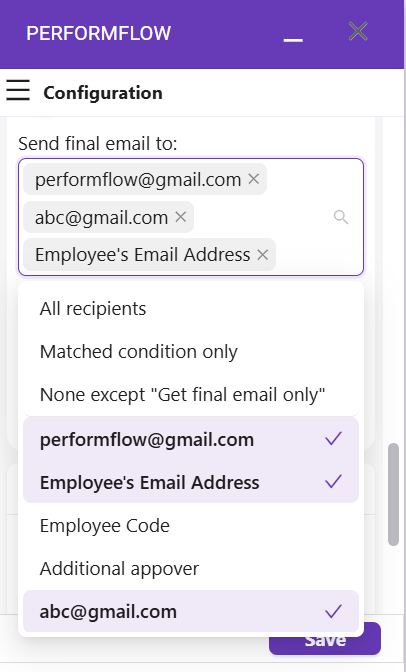
When you select Custom Static & Dynamic Recipients, the add-on displays all declared recipients, including both static and dynamic ones.
Select one or multiple recipients to include.
To add a new recipient, type their email address and press Enter.


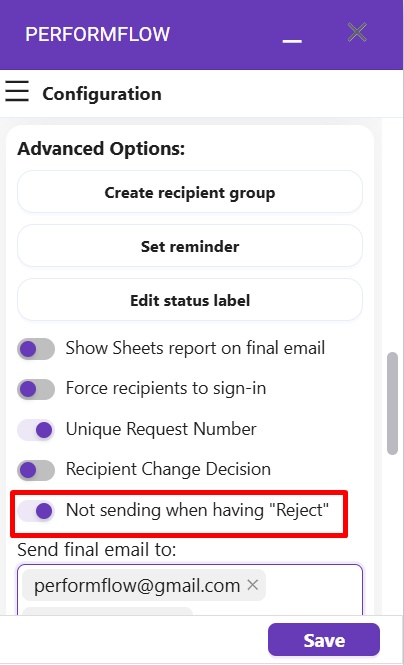
Not Sending When Having “Reject” Switch
In Advanced Options, you’ll find the switch Not sending when having “Reject”.
When this option is enabled, the add-on will not send the final email if any recipient has selected ‘Reject’ during the approval process.
