- User Guide
Tips to Set Up Your First Workflow
Mode 1: Create Approval Workflow Only
1.1. Add Static & Dynamic Recipients
1.3. Set Conditions for the Recipient
1.7. Add & Use Recipient Group
Mode 2 & 3: Generate & Send PDF/document only
2.1. How to generate a PDF/document
2.2. Common file template errors
2.3. Send PDF/documents to recipients
2.4. Send PDF/documents to respondents
3.1. Combine Modes – Setup File Template
3.2. Combine Modes – Add recipients
Email Settings & Features:
4.1. Change Final Email Settings to Save Quota
4.3. Show or Hide the Sheets Report in the Final Email
4.4. Show File Attachment With Recipients
4.6. Customize Email Templates
4.8. Set Conditions for Custom Email Template
4.9. Add CC and BCC Email Addresses
Team Plan:
5.2. Share Edit Permission With Team Member
Additional Features:
6.1. Set Reminders for Approval Emails
6.2. Resend All Pending Requests
6.3. Dashboard or Form Management Page
6.5. Approval Link Authentication
6.6. Transfer All Forms to Another User
6.7. Transfer Paid Plan to Another User
6.8. Avoid Automatic Approval/Rejection
6.9. Signature on Generated PDF/Google Docs in Combined Mode
6.10. Approval Status Tracking Link for Respondent
6.11. Cancel a Request via Email
6.13. Change Approval Decision for Recipients
6.15. Approve via Dashboard for Recipients
6.16. Form Owner Approves on Behalf of Recipients
6.17. Bulk Actions: Approve, Reject, and Cancel
6.18. Set Conditions for Destination Folders
After setting up the add-on through your Google Form, you can now visually create and update your workflow directly in the PerformFlow dashboard.
Open The Visual Workflow
Go to the PerformFlow dashboard and select Build Visual Workflow from the left menu. After selecting your form, you will see a visual flow starting from Form submitted to Workflow complete.
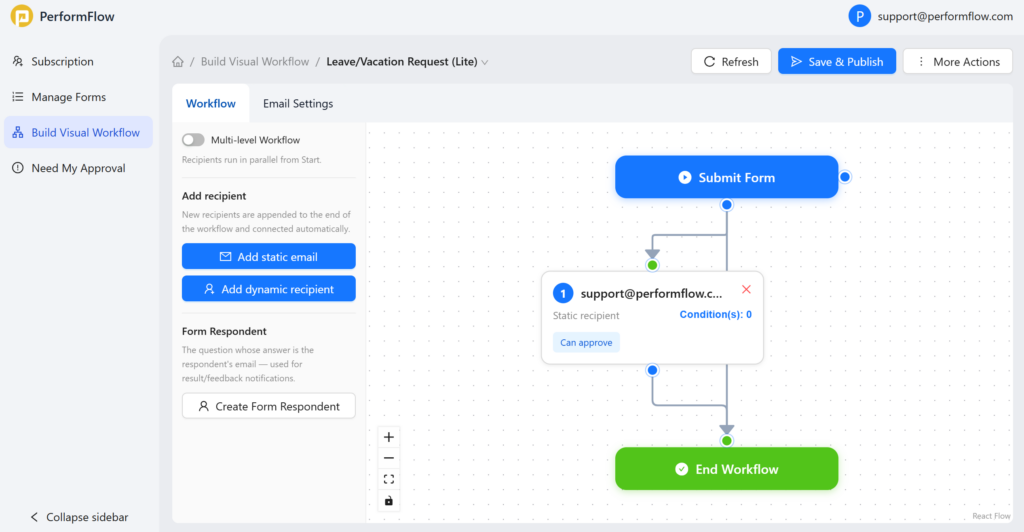
Understand The Workflow Diagram
Each step in your workflow appears as a connected block. This layout helps you quickly understand how requests move from one person to another.
A typical workflow includes:
- Form submitted (starting point)
- Recipient steps (approvers or reviewers)
- Workflow complete (ending point)
Add A Step
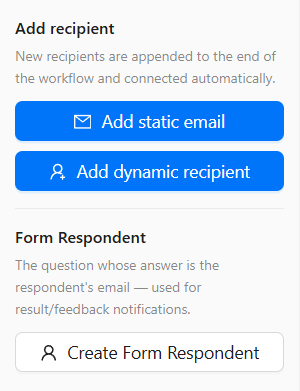
From the left panel, choose how you want to add a new step:
- Add static email to assign a fixed approver
- Add dynamic recipient to use an email from form responses
- Create Form Respondent to add the person who submitted the form as a workflow participant
New steps are automatically added to your diagram and connected in sequence.
Edit A Step
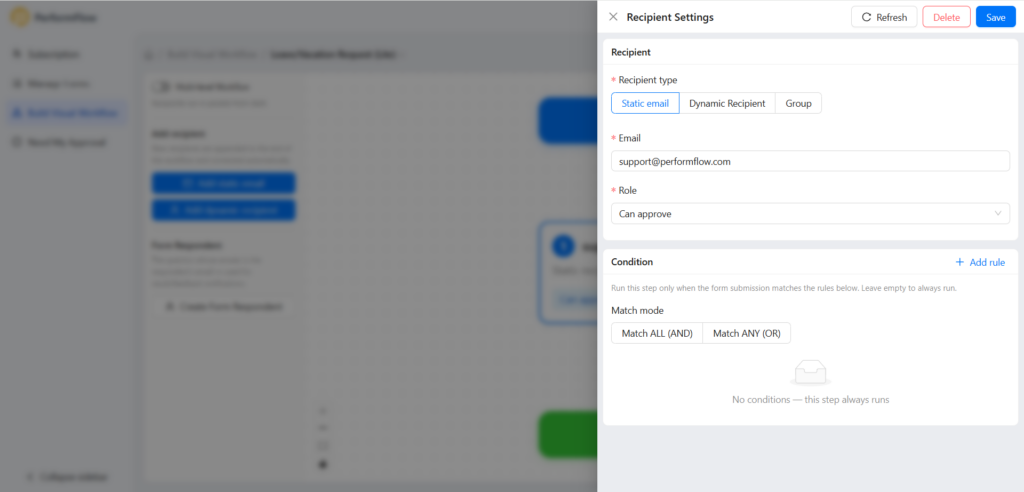
Click on any step in the diagram to update its settings. You can change the recipient, adjust the role, or add conditions to control when the step runs.
Arrange The Workflow
Drag and connect steps to change the order or structure. This allows you to create multi-step approvals or customize the flow based on your needs.
Save Your Changes
Click Save Draft to keep your progress, or Save & Publish to apply changes to your live workflow.
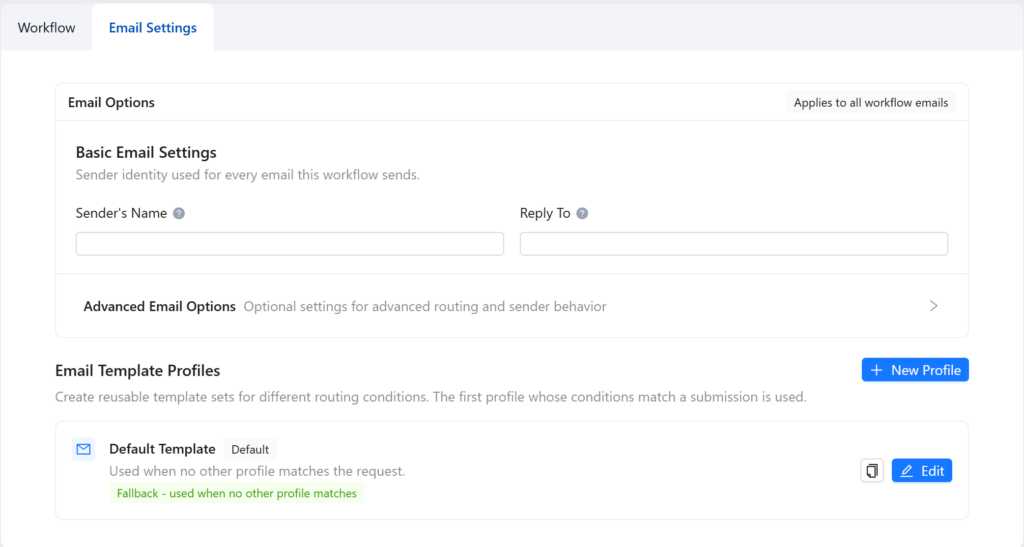
Email Settings
Easily manage and customize email configurations directly within the Email Settings tab. This feature includes Email Options for delivery preferences and Email Templates for personalized messages.
Why Use The Workflow Diagram
The diagram gives you a clear and visual way to manage your workflow without going back to the Google Form. It makes it easier to review, update, and control your approval process in one place.
About Document Generation
The Document Generation tab allows you to automatically create custom Google Docs or Google Sheets every time a form is submitted. By mapping your form answers to a base template, you can automate workflows like generating event tickets, certificates, invoices, or HR leave requests without manual data entry.
To access this feature, open your workflow under Build Visual Workflow and select the Document Generation tab at the top of the workspace.
Choose a base template
When you configure document generation, you must select a Google Docs or Google Sheets file to serve as your base template.
The system uses placeholders within your template to automatically fill in data. To ensure your document generates correctly, use the following placeholder rules:
For Form Questions: Wrap the exact question name in double angle brackets:
<<Form Question>>. The system replaces these with the answers submitted by your users.Example:
<<Full Name>>,<<Reason to Leave>>
For Special Fields (System Data): Wrap the system field name in double curly brackets:
{{Special Field}}. This prevents conflicts if your form has questions with similar names.Example:
{{Approval Status}},{{Signature}},{{Comments}},{{Last Approver}}
Change or update your template
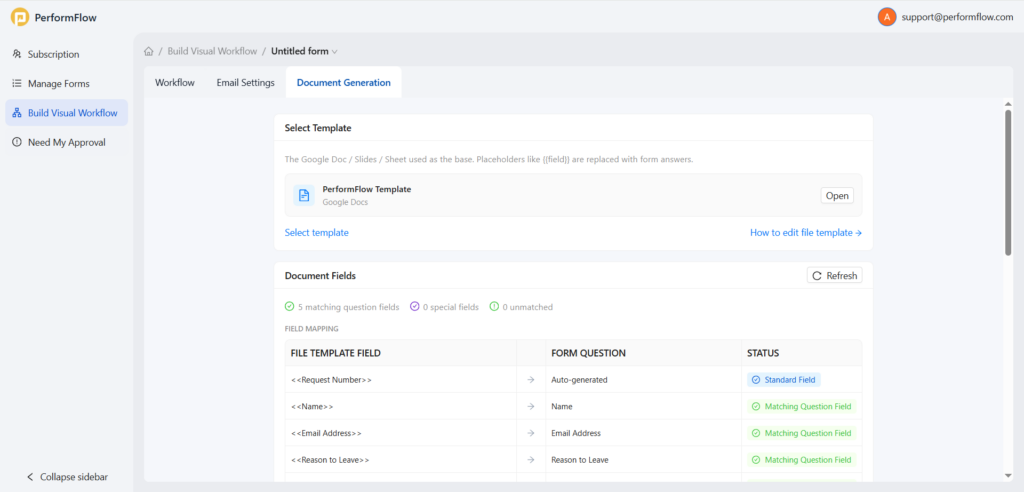
On the Document Generation tab, go to the Select Template section.
Click Select template to browse and choose a different file from your Google Drive.
If you want to view or modify your current template layout, click Open next to the template name.
Manage template fields and mapping
After selecting your template, the Document Fields section displays how the placeholders in your Google Docs or Sheets file connect to your form. The system automatically scans your template and maps fields based on matching names.
Refresh your template fields
If you add, remove, or modify placeholders inside your Google Docs or Sheets file, you must sync those changes with your workflow.
Go to the Document Fields section.
Click Refresh on the right side of the panel. The system will re-scan your file and update the field mapping list.
Understand field mapping statuses
Each detected placeholder shows a specific status under the Field Mapping table:
Standard Field: System-default fields that are automatically generated by the platform for every response.
Example:
<<Request Number>>maps to Auto-generated.
Matching Question Field: Fields that successfully match a question in your form. The system automatically inserts the respondent’s answer into this placeholder.
Example:
<<Email Address>>maps directly to your form’s Email Address question.
Special Field: System data fields used for tracking workflow operations rather than user form answers.
Example:
{{Approval Status}}maps to system workflow status tracking.
Unmatched Field: Placeholders found in your template that do not match any question in your form. If a field remains unmatched, its position in the generated document will be left blank. To fix this, ensure the text inside your template’s
<< >>perfectly matches your form question title, then click Refresh.
Set destination folders for generated documents
The Destination Folders section allows you to choose exactly where your automatically created Google Docs or Sheets are saved on Google Drive. You can set up one default folder for all documents or create smart routing rules based on form responses.
Set a default destination folder
Every workflow requires a default folder where generated files are stored.
Go to the Default Destination card.
To see where your files currently go, click Open to launch the folder directly in Google Drive.
To choose a different location, click Change folder and select a new target folder from your Google Drive.
Route documents using conditional folders
You can automatically send documents to different folders depending on the answers your users submit in the form (e.g., routing a travel request to an “International” or “Domestic” folder based on their selection).
Under the Conditional Folders section, click Add Destination Folder.
Select the target folder from your Google Drive.
Define the routing rule condition (for example: If “Reason to Leave” equals “Maternity Leave”, route the document to the HR – Confidential folder).
Save your changes. If a form submission doesn’t meet any of your custom conditions, the generated document will automatically default to your Default Destination folder.
Set document naming rules and save your workflow
The Document Naming section allows you to customize the file names of your automatically generated documents. Instead of giving every file the same generic name, you can use tokens to dynamically include details from each unique form submission.
Customize your file naming pattern
Go to the Document Naming section.
Click inside the text input box to define your naming pattern. You can type regular text, spaces, or symbols (such as
#or-).To insert dynamic data into your file name, click any of the blue token buttons below the input box.
Example: Clicking the
+ <<Request Number>>and+ <<Name>>tokens will add them directly into your naming pattern.If your pattern looks like
#<<Request Number>> - <<Name>> - Leave Request, a generated file might be named:#1024 - Ashley Harris - Leave Request.
Save your workflow configuration
Once you have completed your setup across all sections (Template selection, Field Mapping, Destination Folders, and Document Naming):
Scroll to the bottom right corner of the Document Generation page.
Click the blue Save button to apply and activate your document automation workflow.